Quick and Easy Homemade Pizza Dough from Scratch
Making pizza dough from scratch can feel like a time-consuming task, but it does not have to be. With a no-knead approach, the process becomes accessible for any home cook. A simple mixture of flour, water, yeast, and salt can develop into a soft, stretchy dough in about half an hour. This method relies on a technique that minimizes physical effort while still producing a base that holds up well under toppings.
The ingredients are pantry staples, and the steps require only basic kitchen tools. For those looking to create a pizza with fresh mozzarella and basil, this dough serves as a neutral canvas that complements those flavors without overwhelming them. The goal is to achieve a crust that is crisp on the outside and airy on the inside, a texture that can be accomplished without a commercial oven or specialty equipment.
This article outlines the steps for preparing a no-knead pizza dough, from selecting ingredients to baking considerations. The focus is on process and technique rather than specific outcomes, as results depend on variables such as oven temperature, humidity, and personal preference. By understanding the role of each component and the logic behind each stage, anyone can adapt the method to their own kitchen environment.
Understanding No-Knead Dough
Traditional pizza dough often requires a long fermentation and repeated kneading to develop gluten. No-knead dough relies on a different principle: time and moisture. By using a higher hydration level and a short resting period, the gluten forms bonds automatically without mechanical manipulation. This approach works well for a 30-minute rise because the yeast is active from the start, and the water content helps the flour absorb evenly.
The no-knead method reduces the barrier to entry for homemade pizza. It eliminates the need for a stand mixer or strong arm muscles. Instead, a simple mixing bowl and a spatula suffice. The dough will appear shaggy at first, but after resting, it becomes cohesive and easy to handle. The key is to allow the mixture to sit undisturbed for the specified time so that the flour can fully hydrate.
For a quick rise, the dough is typically kept at room temperature. Warmer environments speed up yeast activity, but care must be taken not to exceed 85°F (29°C) to avoid overproofing. The resulting dough may not have the same complex flavor as a long-fermented version, but it provides a reliable base for a weeknight meal.
Ingredients and Their Roles
Every ingredient in the dough has a specific function, and understanding these roles helps in making adjustments. All-purpose flour is commonly used because it strikes a balance between protein content and texture. Bread flour can also be used for a chewier crust, but it may require slightly more water due to its higher absorption rate. Water temperature matters: lukewarm water around 100°F (38°C) activates the yeast without killing it.
Instant yeast is preferred for a rapid rise because it does not need to be proofed beforehand. Active dry yeast can be substituted but should be dissolved in a portion of the water first. Salt is essential not only for flavor but also for controlling yeast activity and strengthening the dough structure. Olive oil is optional but adds richness and helps prevent the dough from drying out during the rise.
Using fresh mozzarella and basil as toppings requires a dough that is not too thick or too thin. The moisture content of fresh mozzarella is higher than that of shredded low-moisture cheese, so a slightly higher oven temperature can help the crust crisp before the cheese releases too much liquid. Basil is best added after baking to preserve its color and aroma, though some recipes include it during the last minute of baking.
The Mixing and Rising Process
Begin by combining the dry ingredients: flour, instant yeast, and salt. Whisk them together to distribute the yeast evenly. Then make a well and pour in the lukewarm water and a small amount of olive oil if desired. Mix with a spoon or spatula until a shaggy dough forms and no dry flour remains. The dough will be sticky, which is normal for a no-knead recipe. Cover the bowl with a damp cloth or plastic wrap and let it rest for 30 minutes at room temperature.
During this resting period, the dough will double in size if the yeast is active. The bowl should be large enough to accommodate the expansion. After 30 minutes, the dough should look puffy and have small bubbles on the surface. At this point, it is ready to be shaped. If the dough seems too wet to handle, lightly flour the work surface and your hands. Alternatively, a small amount of olive oil on the hands can prevent sticking without adding excess flour.
After the rise, turn the dough out onto a floured surface. Do not knead it; instead, fold it gently a few times to release large pockets of gas. Divide it into portions depending on the desired pizza size. For a standard 12-inch pizza, the dough ball should weigh about 250 to 300 grams. Let the portions rest for an additional 5 minutes to relax the gluten before shaping.
Shaping and Topping
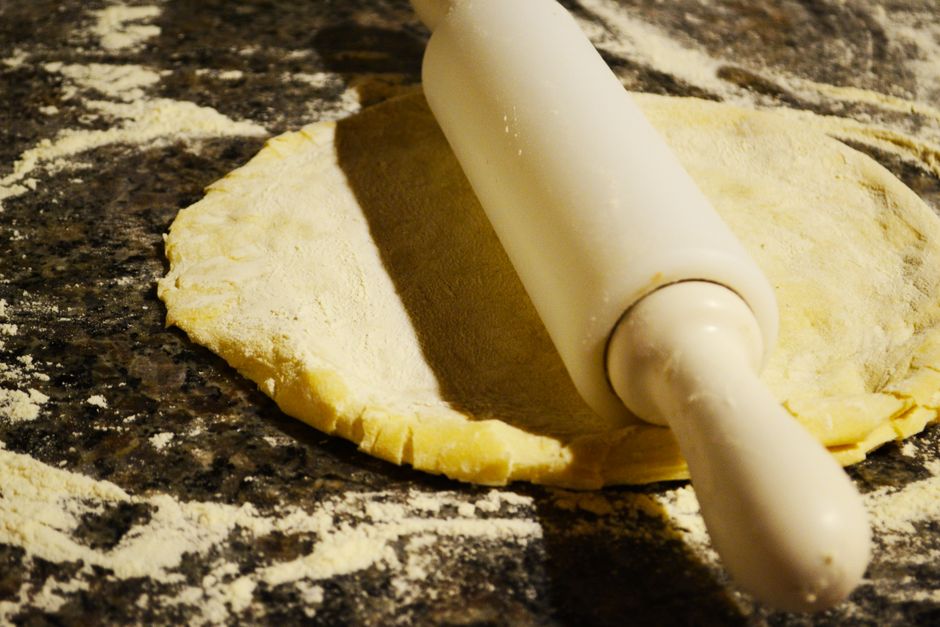
To shape the dough, flatten it into a disk using your fingertips. Avoid using a rolling pin, as it can deflate the air bubbles that contribute to a light texture. Instead, work from the center outward, stretching the dough evenly while leaving a thicker rim for the crust. The dough can be lifted and draped over the knuckles to let gravity assist in stretching, but this requires practice. A simpler approach is to place the dough on a piece of parchment paper and press it out with your palms.
Once shaped, transfer the dough to a preheated baking sheet, pizza stone, or cast iron pan. The surface should be lightly dusted with cornmeal or semolina to prevent sticking. For toppings, start with a thin layer of tomato sauce if used, but many no-knead recipes benefit from a minimal sauce to avoid a soggy center. Tear fresh mozzarella into small pieces and distribute them evenly. Avoid oversaturating the center with cheese, as that area tends to cook slower.
Fresh basil leaves can be placed on top after the pizza comes out of the oven, or they can be added during the last minute of baking for a wilted effect. Drizzle with extra virgin olive oil and a pinch of sea salt before baking. The goal is to achieve a balance between the tender dough and the toppings without creating excess moisture that hinders crust development.
Baking Tips
Oven temperature plays a significant role in the final texture. For a no-knead pizza that rises in 30 minutes, a high heat of 475°F to 500°F (245°C to 260°C) is often recommended. Preheat the oven for at least 30 minutes with a baking stone or inverted baking sheet inside if possible. The thermal mass helps maintain temperature and promotes a crisp bottom crust. If using a standard baking sheet, placing it on the bottom rack can help achieve similar results.
Baking time typically ranges from 10 to 15 minutes, depending on thickness and toppings. Watch for the crust to turn golden brown and the cheese to bubble. If the top browns too quickly, tent the pizza loosely with foil. If the bottom remains pale, slide the pizza directly onto the oven rack for the last two minutes, though this should be done carefully to avoid burns. Let the pizza rest for a few minutes before slicing to allow the cheese to set.
Adjustments may be needed based on individual ovens. Convection settings can reduce baking time by a few minutes, so keep an eye on the pizza. The dough itself will change color and texture as it bakes, and the internal temperature of the crust should reach at least 200°F (93°C) for proper doneness. A thermometer can be helpful for consistency.
Variations and Serving Suggestions
The no-knead dough can be adapted for different dietary preferences or flavor profiles. Whole wheat flour can replace up to half of the all-purpose flour, but additional water may be needed because whole wheat absorbs more moisture. Gluten-free flour blends are not recommended for this specific method due to the lack of kneading and short rise time, though specialty blends designed for pizza may work with adjusted hydration.
Regarding toppings, the combination of fresh mozzarella and basil is a classic, but other options include sliced tomatoes, roasted vegetables, or prosciutto added after baking. For a white pizza, a base of ricotta or garlic-infused olive oil can be used instead of tomato sauce. The same dough can also be shaped into smaller individual pizzas or even breadsticks by cutting it into strips after baking.
Serving suggestions include pairing the pizza with a simple green salad dressed with lemon vinaigrette or a light arugula salad. The acidity of the dressing can complement the richness of the cheese. For beverages, still or sparkling water with lemon is a common choice, though personal preferences vary. The focus remains on a meal that can be prepared within a short time frame, using ingredients that are readily available in most kitchens.